Overview
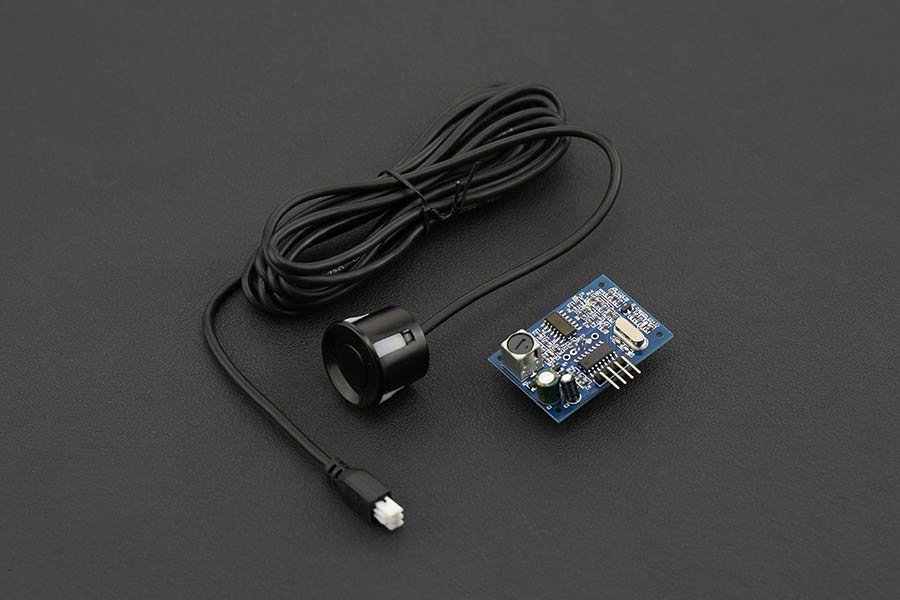
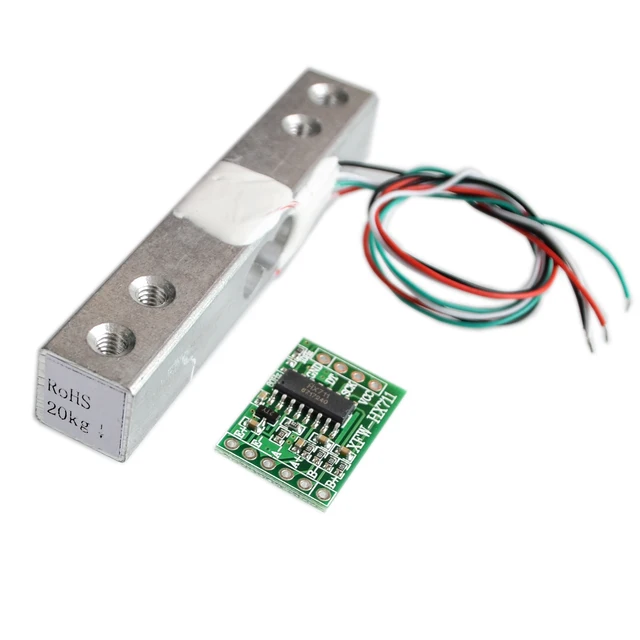
This project aims to develop wireless monitoring using IoT Technology to interface the data acquired from the sensors to your smartphone. The project uses Blynk IoT platform to handle the data acquired. Two sets of sensor data are monitored: (1) water level, and (2) weight. The water level monitoring is part of an automated pumping system which
automatically fills a tank with water if the water level is too low.
Hardware Used
Parts Overview


Load cells use a four wire Wheatstone bridge to connect to the HX711 chip.

Library Used
- Blynk Library
- HX711.h
- NewPing.h
- WiFi.h
- WiFiClient.h
- BlynkSimpleEsp32.h
Software Used
Hardware Set-up
Schematic Diagram


Software Set-up
First we need to set up a Blynk account. In order to use Blynk we must download first the application from Google play if you’re using Android or App Store if using Apple otherwise.
Here are the steps in setting up Blynk :
1. Create Account
After you download the Blynk App, you’ll need to create a New Blynk account. This account is separate from the accounts used for the Blynk Forums, in case you already have one.
We recommend using a real email address because it will simplify things later.

An account is needed to save your projects and have access to them from multiple devices from anywhere. It’s also a security measure.
2.Create a New Project

3. Choose Your Hardware

4. Get your Authentication Token


5. Adding Widgets


Here are more tutorials and projects on Blynk.
Code:
/* Calibration sketch for HX711 */

#include "HX711.h"  // Library needed to communicate with HX711 https://github.com/bogde/HX711

#define DOUT  16//  pin G16 connect to HX711 DOUT
#define CLK  17  //   pin G17 connect to HX711 CLK

HX711 scale;  // Init of library

void setup() {
  Serial.begin(9600);
  scale.begin(DOUT, CLK);
  scale.set_scale();  // Start scale
  scale.tare();       // Reset scale to zero
}

void loop() {
  float current_weight=scale.get_units(5);  // get average of 20 scale readings
  float scale_factor=(current_weight/0.173);  // divide the result by a known weight
  Serial.println(scale_factor);  // Print the scale factor to use
}
This is for the calibration of your load cell. The number 0.173 represents the known weight, in my case I used the weight of my cellphone as my reference for the known weight. For more information about calibrating your load cell follow this link https://www.youtube.com/watch?v=pZpzdu97JYw
#include <MedianFilter.h>
#define BLYNK_PRINT Serial
#include "HX711.h"
#include <WiFi.h>
#include <WiFiClient.h>
#include <BlynkSimpleEsp32.h>
#include <NewPing.h>

// You should get Auth Token in the Blynk App.
// Go to the Project Settings (nut icon).
char auth[] = " Your Auth Token ";

// Your WiFi credentials.
// Set password to "" for open networks.
char ssid[] = "Your Wifi SSID";
char pass[] = "Your Wifi Password";
BlynkTimer timer;

#define TRIGGER_PIN  26// Arduino pin tied to trigger pin on the ultrasonic sensor.
#define ECHO_PIN     25  // Arduino pin tied to echo pin on the ultrasonic sensor.

#define PI  3.1415926535897932384626433832795

#define calibration_factor  106005.00 //This value is obtained using the SparkFun_HX711_Calibration sketch

#define DOUT  16
#define CLK  17

 // NewPing setup of pins and maximum distance.
HX711 scale;

const int MAX_DISTANCE = 100; // Maximum distance we want to ping for (in centimeters). Maximum sensor distance is rated at 400-500cm.
const int DIAM = 20;
const int DEPTH = 60;
const unsigned int Period = 1000;
const int Area1 = PI * ((DIAM / 2) * (DIAM / 2));

 int litrs,dist,dept;

NewPing sonar = NewPing(TRIGGER_PIN, ECHO_PIN, MAX_DISTANCE);

void readings()
{
  dist = sonar.ping_cm();                                         //get distance to the top of the water tank 1
   if (dist >= DEPTH || dist == 0 )  dist = DEPTH;                   //check it does not go negative
    dept = DEPTH - dist;                                   //calculate the depth of the water
    litrs = (Area1 * dept)/1000 ;                             //calculate the volume of the water as litres
    delay(50);

    Blynk.virtualWrite(V0, dept);                                //send depth to Blynk server
    Blynk.virtualWrite(V3, litrs);                                            //send litres to Blynk server
    Blynk.virtualWrite(V1, litrs / 10);                                   //send litres to Blynk server. for vertical level widget & chart,
    Blynk.virtualWrite(V2,scale.get_units());
    pumpTrig();

     //scaled to 1/10 as Blynk only goes up to 9999 and we need up to 16000
    delay(50);

    Serial.println();
    Serial.println();
    Serial.println("Tank  water distance: " + String(dist));      //print depth
    Serial.println("Tank  water depth: " + String(dept));     //print depth
    Serial.println("Tank  Litres: " + String(litrs));

   Serial.print("Reading: ");
  Serial.print(scale.get_units(20), 3); //scale.get_units() returns a float
  Serial.print(" kg"); //You can change this to kg but you'll need to refactor the calibration_factor
  Serial.println();


}
void pumpTrig(){
if (litrs <=3 ){
digitalWrite(12,LOW);
Blynk.virtualWrite(V12, "PUMP ON");
}
if (litrs >= 5)
{
  digitalWrite(12,HIGH);
  Blynk.virtualWrite(V12, "PUMP OFF");
}


}

void setup()
{  scale.begin(DOUT, CLK);
 scale.set_scale(calibration_factor);
  scale.tare(); //Assuming there is no weight on the scale at start up, reset the scale to 0

  pinMode(12,OUTPUT) ;
  digitalWrite(12,HIGH);

  Serial.println("Readings:");
  // Debug console
  Serial.begin(9600);
 timer.setInterval(Period, readings);
  Blynk.begin(auth, ssid, pass);
}

void loop()
{
  Blynk.run();
  timer.run();
}
This is the code for the final system. As you can see there is no other statements on the loop function other than the blynk.run() which does the handling and interfacing of output data.
Code Breakdown
dist = sonar.ping_cm();
This Function is for getting the distance and automatically convert it to cm
Blynk.virtualWrite(V0, dept);
Blynk.virtualWrite(V3, litrs);
Blynk.virtualWrite(V1, litrs);
Blynk.virtualWrite(V2,scale.get_units());
This is for sending the data gathered from the hardware, to the Blynk server.
Blynk.run();
This is a main blynk routine responsible for keeping connection alive, sending data, receiving data, etc.
BlynkTimer timer;
This macro instance allows you to send data periodically with given intervals not interfering with Blynk library routines.

Conclusion
The project needs a more thorough calibration and a fixed mechanical enclosure. Specially the load cell, we need to mount and fix it properly so that the platform is sturdy and stable across the full range of loads that can possibly be placed above it. But overall the data gathered and the functionality of the system is accurate. Also the Blynk platform offers a fast way to prototype an IoT application.
Reference
- https://www.brainy-bits.com/load-cell-and-hx711-with-arduino/
- https://examples.blynk.cc/?board=ESP8266&shield=ESP8266%20WiFi&example=GettingStarted%2FBlynkBlink
- https://www.instructables.com/id/Water-Tank-Levels-by-WiFi-on-Your-Phone/
- https://docs.blynk.cc/#getting-started
- https://wiki.dfrobot.com/Weather_-_proof_Ultrasonic_Sensor_with_Separate_Probe_SKU___SEN0208
The post Water Level and Weight Monitoring using Waterproof Ultrasonic Sensor and HX711 Load Cell, with Blynk App appeared first on CreateLabz.


