

Overview
This project features a customizable digital mood lamp built with the Raspberry Pi Pico. It allows users to interact with lighting patterns using a capacitive touch sensor and adjust brightness using a potentiometer.
Powered by 16 individually controlled RGB LEDs on a NeoPixel ring, the lamp offers various modes such as rainbow, breathing effect, solid colors, and blinking.
Programming is done in MicroPython via the Thonny IDE, making it beginner-friendly and ideal for learning about embedded electronics and interactive lighting.
Hardware Used
- Raspberry Pi Pico
- NeoPixel Ring - 16 x 5050 RGB LED with Integrated Drivers
- Potentiometer
- Digital Touch Sensor
- Breadboard 830 Tie points
-
Dupont Jumper Wires (Female to Female / Male to Male / Male to Female)
Software Used
- MicroPython
- Thonny IDE
Application Discussion
- RASPBERRY PI PICO

A low-cost microcontroller board based on the RP2040 chip. It runs the MicroPython code and acts as the brain of the lamp. It processes inputs from the touch sensor and potentiometer and drives the NeoPixel ring.
- NEOPIXEL RING - 16 X 5050 RGB LED WITH INTEGRATED DRIVERS

Provides colorful LED lighting effects. Each LED can be individually controlled for dynamic animations like rainbow or breathing effects. It’s controlled through a single data pin using MicroPython’s timing and math libraries.
-
POTENTIOMETER
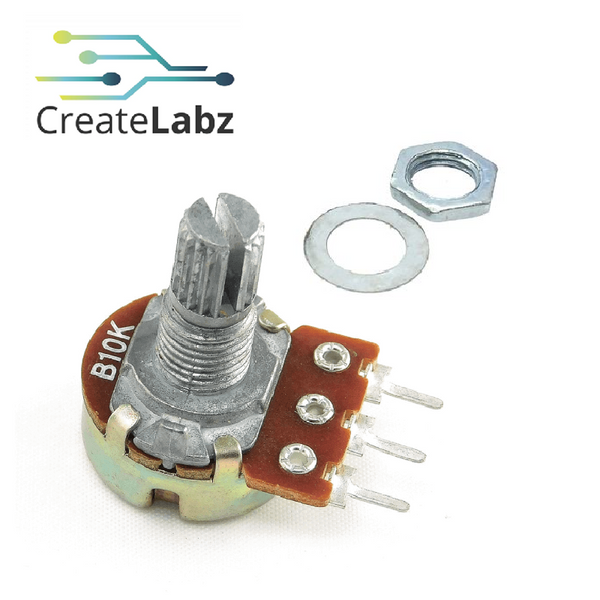
An analog input that allows users to change the brightness of the LEDs. Connected to one of the Pico’s ADC (analog-to-digital converter) pins, it provides a value between 0 and 65,535 which is then scaled to adjust the LED intensity.
- DIGITAL TOUCH SENSOR
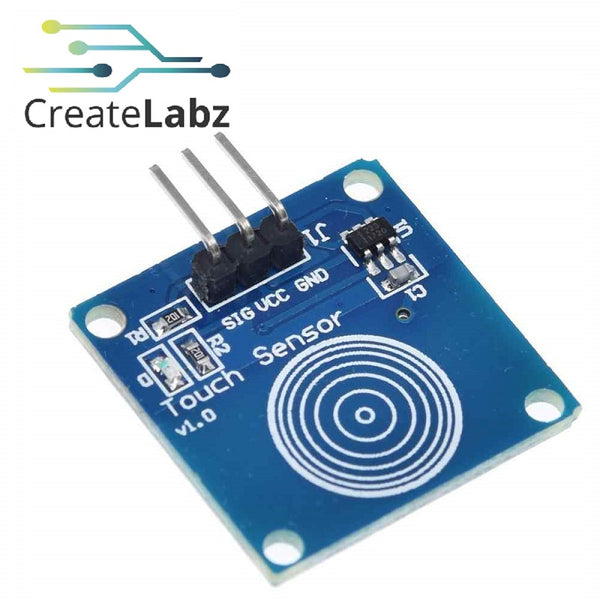
Acts like a touch-sensitive button. Every tap cycles the lamp through six different modes. It provides a digital HIGH signal when touched, making it easy to detect input through code.
- BREADBOARD AND JUMPER WIRES
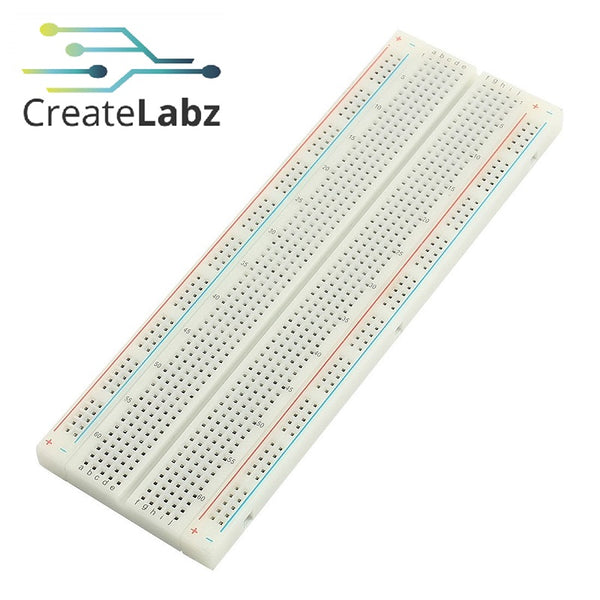
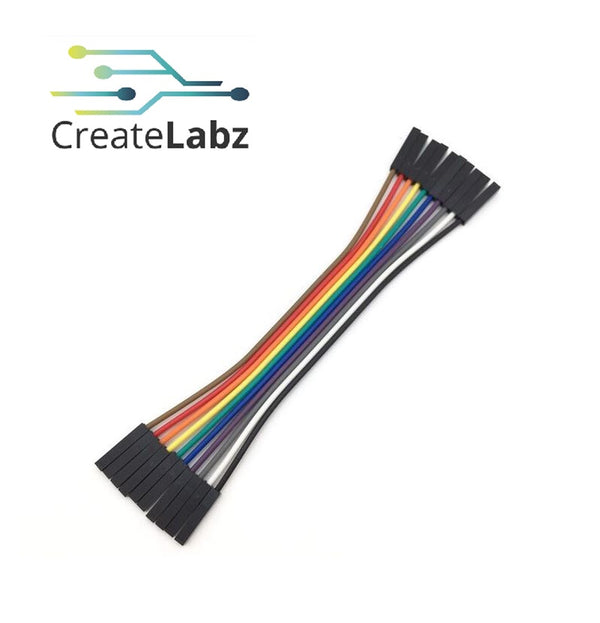
Used for non-permanent prototyping. All connections between components and the Raspberry Pi Pico are made here, allowing for easy debugging and adjustments.
OTHERS
- MICROPYTHON
![]()
MicroPython is a lean version of Python designed for microcontrollers. It lets you program the Raspberry Pi Pico in a language that’s simple and easy to understand, making it perfect for students. In this project, it’s used to control the LED patterns, read analog and digital inputs, and handle brightness scaling.
- THONNY IDE
![]()
Thonny is a beginner-friendly Python IDE that supports MicroPython directly. It’s used to write, upload, and run the code on the Raspberry Pi Pico. It also allows Serial printing for debugging. Thonny makes coding on hardware easier by offering real-time output and error messages.
Hardware Setup

Software Setup
Use the micro-python code below:
import machine
import time
import neopixel
import math
# === Pin Definitions ===
PIN_TOUCH = 14 # Digital touch sensor
PIN_NEOPIXEL = 15 # NeoPixel data pin
PIN_POT = 26 # Potentiometer analog pin
# === LED Settings ===
NUM_LEDS = 16
ALL_LEDS = list(range(NUM_LEDS)) # Use all 16 LEDs
np = neopixel.NeoPixel(machine.Pin(PIN_NEOPIXEL), NUM_LEDS)
# === Touch Sensor Setup ===
touch = machine.Pin(PIN_TOUCH, machine.Pin.IN)
last_touch_state = 0
touch_count = 0
mode = 0
# === Potentiometer (ADC) Setup ===
pot = machine.ADC(PIN_POT)
# === Breathing Effect Setup ===
breathing_phase = 0
# === Rainbow Effect Setup ===
def wheel(pos):
if pos < 0 or pos > 255:
return (0, 0, 0)
if pos < 85:
return (int(pos * 3), int(255 - pos * 3), 0)
if pos < 170:
pos -= 85
return (int(255 - pos * 3), 0, int(pos * 3))
pos -= 170
return (0, int(pos * 3), int(255 - pos * 3))
def show_rainbow(offset, brightness):
for i in ALL_LEDS:
color = wheel((int(i * 256 / len(ALL_LEDS)) + offset) % 256)
scaled = tuple(int(c * brightness) for c in color)
np[i] = scaled
np.write()
# === Helper for printing mode names ===
def print_mode(touch_count):
mode_names = {
1: "Solid White",
2: "Breathing Yellow",
3: "Red",
4: "Rainbow",
5: "Blinking Blue Stars",
6: "Off"
}
print(f"Touch count: {touch_count} → Mode: {mode_names.get(touch_count, 'Unknown')}")
# === Main Loop ===
rainbow_offset = 0
blink_state = True
while True:
# Read brightness from potentiometer
brightness = pot.read_u16() / 65535
brightness = max(0.05, brightness)
# Touch detection (rising edge)
current_touch_state = touch.value()
if current_touch_state == 1 and last_touch_state == 0:
touch_count += 1
if touch_count > 6:
touch_count = 1
print_mode(touch_count)
last_touch_state = current_touch_state
# Set mode based on touch count
if touch_count == 1:
mode = 1
elif touch_count == 2:
mode = 2
elif touch_count == 3:
mode = 3
elif touch_count == 4:
mode = 4
elif touch_count == 5:
mode = 5
elif touch_count == 6:
mode = 6
# Mode behaviors
if mode == 1:
for i in ALL_LEDS:
np[i] = (int(255 * brightness), int(255 * brightness), int(255 * brightness))
np.write()
elif mode == 2:
breath = (math.sin(breathing_phase) + 1) / 2
scaled = int(breath * 255 * brightness)
for i in ALL_LEDS:
np[i] = (scaled, scaled, 0)
np.write()
breathing_phase += 0.1
if breathing_phase > 2 * math.pi:
breathing_phase = 0
time.sleep(0.05)
elif mode == 3:
for i in ALL_LEDS:
np[i] = (int(255 * brightness), 0, 0)
np.write()
elif mode == 4:
show_rainbow(rainbow_offset, brightness)
rainbow_offset = (rainbow_offset + 1) % 256
time.sleep(0.05)
elif mode == 5:
color = (0, 0, int(255 * brightness)) if blink_state else (0, 0, 0)
for i in ALL_LEDS:
np[i] = color
np.write()
blink_state = not blink_state
time.sleep(0.1)
elif mode == 6:
for i in ALL_LEDS:
np[i] = (0, 0, 0)
np.write()
time.sleep(0.05)
Code Breakdown
import machine
import time
import neopixel
import math
Discussion:
These are the essential libraries used in MicroPython:
-
machine: lets us control the Raspberry Pi Pico’s hardware pins.
-
time: used for adding delays (e.g., blinking or breathing effects).
-
neopixel: controls the RGB LEDs in the NeoPixel ring.
-
math: helps create smooth animation effects like breathing using sine waves.
Pin Assignments
PIN_TOUCH = 14
PIN_NEOPIXEL = 15
PIN_POT = 26
Discussion:
-
PIN_TOUCH: Pin connected to the digital touch sensor.
-
PIN_NEOPIXEL: Data pin for controlling the NeoPixel ring.
-
PIN_POT: Pin connected to the potentiometer (analog input).
LED Setup
NUM_LEDS = 16
ALL_LEDS = list(range(NUM_LEDS))
np = neopixel.NeoPixel(machine.Pin(PIN_NEOPIXEL), NUM_LEDS)
Discussion:
-
NUM_LEDS: Total number of LEDs in the NeoPixel ring.
-
ALL_LEDS: List of LED indices (0 to 15).
-
np: Initializes NeoPixel control on the specified pin.
Touch Sensor Setup
touch = machine.Pin(PIN_TOUCH, machine.Pin.IN)
last_touch_state = 0
touch_count = 0
mode = 0
Discussion:
-
Configures the touch pin as an input.
-
last_touch_state: Remembers the last touch to detect rising edges.
-
touch_count: Counts the number of taps to switch between light modes.
-
mode: Stores the current mode selected by the user.
Potentiometer Setup
pot = machine.ADC(PIN_POT)
Discussion:
Sets up analog input from the potentiometer, which is used to control brightness (from 0 to full).
Breathing Effect Tracking
breathing_phase = 0
Discussion:
Used to store the current position in the sine wave for smooth breathing animation.
Rainbow Helper Functions
def wheel(pos):
.....
def show_rainbow(offset, brightness):
.....
Discussion:
-
wheel(pos): Generates RGB values for rainbow colors based on a position (0-255).
-
show_rainbow(offset, brightness): Displays a flowing rainbow effect by adjusting each LED’s color and brightness.
Mode Print Function
def print_mode(touch_count):
.....
Discussion:
Prints the name of the current lighting mode each time you touch the sensor. Useful for debugging or viewing in the Thonny terminal.
Main Loop Logic
rainbow_offset = 0
blink_state = True
while True:
brightness = pot.read_u16() / 65535
brightness = max(0.05, brightness)
Discussion:
-
Reads the potentiometer value and scales it between 0 and 1.
-
Sets a minimum brightness of 5% to avoid turning LEDs fully off.
Touch Detection
current_touch_state = touch.value()
if current_touch_state == 1 and last_touch_state == 0:
touch_count += 1
if touch_count > 6:
touch_count = 1
print_mode(touch_count)
last_touch_state = current_touch_state
Discussion:
-
Detects a new touch (rising edge).
-
Cycles through 6 different modes with each tap.
-
Resets to 1 after reaching mode 6.
Mode Selection
if touch_count == 1:
mode = 1
.....
elif touch_count == 6:
mode = 6
Discussion:
Selects which lighting mode should run based on touch count.
Mode Actions
Mode 1 – Solid White
for i in ALL_LEDS:
np[i] = (int(255 * brightness), int(255 * brightness), int(255 * brightness))
np.write()
Discussion:
All LEDs turn solid white, scaled by potentiometer brightness.
Mode 2 – Breathing Yellow
breath = (math.sin(breathing_phase) + 1) / 2
scaled = int(breath * 255 * brightness)
for i in ALL_LEDS:
np[i] = (scaled, scaled, 0)
np.write()
breathing_phase += 0.1
.....
Discussion:
Creates a smooth fade in/out yellow effect using a sine wave. Yellow = red + green.
Mode 3 – Solid Red
for i in ALL_LEDS:
np[i] = (int(255 * brightness), 0, 0)
np.write()
Discussion:
Displays red color on all LEDs.
Mode 4 – Rainbow Animation
show_rainbow(rainbow_offset, brightness)
rainbow_offset = (rainbow_offset + 1) % 256
time.sleep(0.05)
Discussion:
Creates a dynamic, moving rainbow effect across the LED ring.
Mode 5 – Blinking Blue (Stars)
color = (0, 0, int(255 * brightness)) if blink_state else (0, 0, 0)
.....
blink_state = not blink_state
time.sleep(0.1)
Discussion:
LEDs blink blue on/off rapidly like twinkling stars.
Mode 6 – Off
for i in ALL_LEDS:
np[i] = (0, 0, 0)
np.write()
Discussion:
Turns all LEDs off.
Testing and Calibration:
-
Power Testing:
Initially, we powered the LEDs through the Pico's 3.3V pin, which caused flickering. Using an external 5V power source solved the issue. -
Touch Sensor Response:
We verified each touch properly increased the mode count (1 to 6), and added debouncing using a small delay to avoid accidental double triggers. -
Brightness Range:
The potentiometer was tested using print() statements in Thonny to view raw ADC values. We then scaled these to LED brightness between 5% (to remain visible) and 100%. -
Animation Timing:
Animation delays were tweaked (e.g., time.sleep(0.05)) to make transitions smooth and visually pleasing.
Final Adjustments:
- Secured all jumper wires on the breadboard to prevent connection drops.
- Optimized brightness scaling to avoid overly dim or overly bright states.
- Repositioned the touch sensor to avoid unintentional activation due to environmental interference.
- Cleaned up the Serial output in Thonny for debugging.
-
Ensured each lighting mode runs efficiently without crashing the Pico.
Video Demonstration
Conclusion
This interactive Digital Mood Lamp is a fun and functional way to explore microcontrollers, sensors, and LED control. With multiple lighting modes, touch interaction, and brightness adjustment, it teaches real-world embedded programming concepts using MicroPython on the Raspberry Pi Pico. The use of Thonny IDE ensures a beginner-friendly experience, while the end result is a visually stunning lamp that responds to human touch.
References
- Raspberry Pi Pico Official Docs
- NeoPixel Uberguide by Adafruit
- MicroPython Reference for Pico
- Thonny IDE Setup
- Random Nerd Tutorials – MicroPython & Sensors
- Raspberry Pi Pico + MicroPython NeoPixel Projects
Project Authors
- Lenie Joy Badil
- Naphtali Montayre


