Overview:
Let's talk about closure. I mean Proximity!
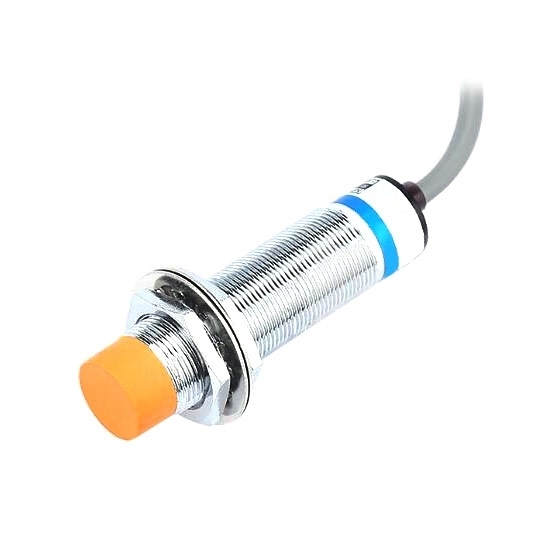
In this tutorial, we will be using two proximity sensors; inductive and capacitive. we will be making two basic application for both sensors and will be discussing its difference in terms of how they detect and work.
Hardware Used:
Software Used:
- Arduino IDE
Application Discussion:
A proximity sensor is a device that can detect the presence of nearby objects.
Today, proximity sensors are commonly used alongside Arduino for many applications, ranging from distance measurement to object detection.
The two mostly used proximity sensors are the Inductive proximity sensor and the Capacitive proximity sensor.
Inductive proximity sensor can only detect metal objects, specifically
Ferrous metals such as iron and steel.

Inductive sensor can only detect metal because of the electromagnetic field. The inductive characteristics of the metal change the properties of the field when a metal target enters the electromagnetic field, and will alert the proximity sensor to the presence of a metallic target.
This type of proximity sensor is commonly used for metal detecting projects.

On the other hand, Capacitive proximity sensors, are not limited to metallic targets. Capacitive proximity sensors can detect anything that can carry an electrical charge such as glass and wood.
This type of proximity sensor can also detect liquids and is also used in liquid-level detection.

Capacitive sensor works kind of similarly with the inductive type, but when a ferrous or non-ferrous enters the sensitive zone (green lines), capacitance increases and will cause oscillation resulting to a detection of an object.

These are just two of many proximity sensors available at CreateLabz Store! Go visit Createlabz Store, where you can order hundreds of high quality electronic components and modules.
APPLICATION 1: Capacitive Proximity Sensor
Since Capacitive Proximity Sensors are good for liquid-level detection, then we will be making a water-level indicator with Water pump, 5v Relay, LEDs and Buzzer.
Hardware Set-Up:

*Note:
The BLUE WIRE on both Proximity Sensors is for GND
The BLACK WIRE is for the INPUT PIN
The RED WIRE is for the SUPPLY VOLTAGE.
Software Set-Up:
This project doesn't need a library.
Open your Arduino IDE and Upload the code below or you can download it on GITHUB.
Code:
#define Capacitive 2
#define LED1 5
#define LED2 6
#define Relay 8

void setup(){
pinMode(2,INPUT);
pinMode(5, OUTPUT);
pinMode(6, OUTPUT);
pinMode(8,OUTPUT);
}

void loop(){
 if (digitalRead(Capacitive) == HIGH)
 { digitalWrite(5, HIGH);
   digitalWrite(6, LOW);
   digitalWrite(8,LOW);
 }

 else {
  digitalWrite(5,LOW);
  digitalWrite(6, HIGH);
  digitalWrite(8,HIGH);
 }
}
-
#define
it is a useful component that allows you to give a name to a constant value before the program is compiled and it don't take up any program memory space -
pinMode()
it is used to configure a specific pin to behave either as an INPUT or an OUTPUT. - digitalWrite()
Reads the value from a specified digital pin, either HIGH or LOW.
APPLICATION 2: Inductive Proximity Sensor
For inductive Proximity Sensor, we will be making a Metal detector with LEDs and Buzzer.
Hardware Set-Up:

Software Set-Up:
This project doesn't need a library. Open your Arduino IDE and Upload the code below or you can download it on GITHUB.
#define Inductive 3
#define Led1 5
#define Led2 6
#define buzzer 7
#define value

void setup()
{
Serial.begin(9600);
pinMode(Inductive,INPUT);
pinMode(Led1,OUTPUT);
pinMode(Led2,OUTPUT);
pinMode(buzzer,OUTPUT);

}
void loop(){
value = analogRead(Inductive);
if(value!=state)
{
  state=value;
  if (state==0){
  digitalWrite(5,HIGH);
  digitalWrite(6, LOW);
  analogWrite(7, HIGH);
  tone(7, 500);
  }

   else{
  digitalWrite(5,LOW);
  digitalWrite(6, HIGH);
  analogWrite(7, LOW);
  noTone(7);
    }
 }
-
loop()
Every time the inductive proximity sensor detects metal, automatically led1 and buzzer will turn on. -
tone(pin, frequency, duration)
Pin: Arduino pin to generate the tone.
Frequency: tone in hertz.
Duration: the duration of the tone in milliseconds (optional). -
noTone()
stops the tone of the buzzer.
Video Output of Capacitive Proximity Sensor
Video Output of Inductive Proximity Sensor
Conclusion
This tutorial was able to differentiate between the two proximity sensors and even made its own application. The Capacitive Proximity sensor can basically detect anything, whether solid or liquid, and therefore a great sensor for the detection of water levels. While, the Inductive Proximity Sensor focuses on the detection of magnetic metals such as steel.
Both sensors are easy to use together with other modules. Just make sure to remember that the blue wire is the ground and not the black wire.
Reference:
Proximity Sensors: Inductive and Capacitive Proximity Sensors with Arduino (electroniclinic.com)


